Withdrawal
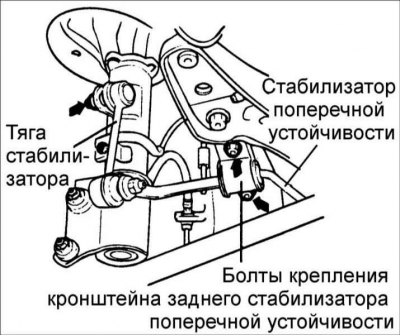
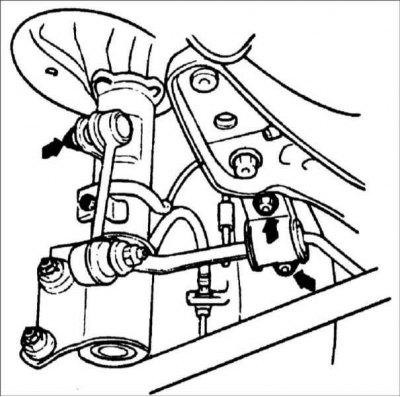
1. Remove the anti-roll bar link.

2. Turn out bolts and remove arms of fastening of the back stabilizer of cross-section stability.
3. Remove the anti-roll bar.
Examination

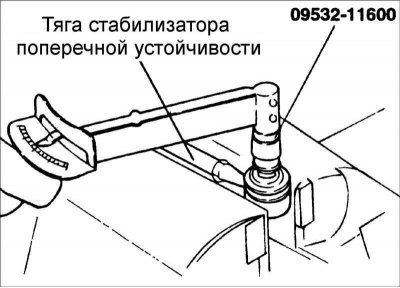
Check the torque required to rotate the stabilizer link ball joint trunnion.
1. If there are cracks in the protective boot, replace it and add grease to the hinge.
2. Rock the stabilizer link ball joint pin from side to side several times.
3. Install a self-locking nut onto the ball joint trunnion and measure the torque. Using a torque wrench, turn the ball joint pin by the self-locking nut and, at the fifth turn, measure the torque that must be applied to turn the ball joint pin. Torque: 1.7 - 3.2 Nm.
4. If the torque exceeds the allowable values, replace the stabilizer link.
5. If the torque is well below the allowable value, the ball joint can be reused as long as it does not jam or have excessive play.
Installation
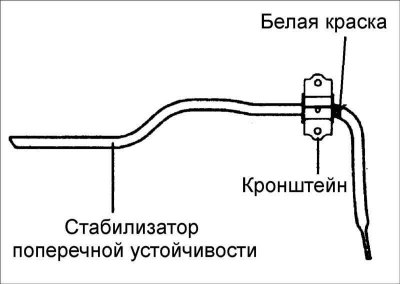
1. Install the bushing on the anti-roll bar.

Attention! Align the bushing with the white paint mark on the anti-roll bar.
2. Align the bracket with the hub. Make sure the bracket fits securely around the stabilizer bar bush.

3. Tighten the screw connections to the required torque. Torque:
- Rear anti-roll bar bracket: 17–26 Nm
- Rear anti-roll bar link: 35–45 Nm
