
Withdrawal
Loosen the wheel nuts of the vehicle on the ground.
Raise the front of the car and remove the front wheel, having previously marked the position of the disk relative to the hub.
Attention: It is not allowed to change the brake pads from pairs on the clear side to the inside and vice versa, as well as from the right wheel to the left and vice versa. Be sure to change all the pads of one axle at once. If the pads are to be reinstalled, they should be marked.
Bend the lock washer of the caliper mounting bolt.
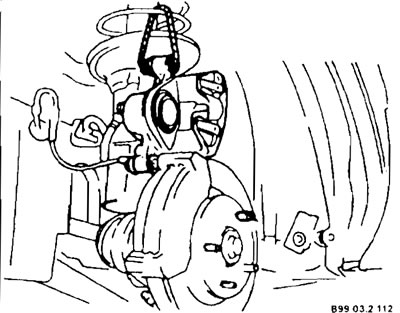
Pull the brake caliper outward with your hands to push the piston in.
Loosen the lower brake caliper pin.
Pull the caliper up and hang it on the wire to the shock strut spring.
Remove the brake pads.
Installation
Attention: Do not press the brake pedal when the pads are removed, otherwise the piston will come out of the housing.
Clean the guide surface and brake pad mounting points with a soft metal brush or wipe with a cloth dampened with alcohol. Do not use solvents containing mineral oils or sharp tools.
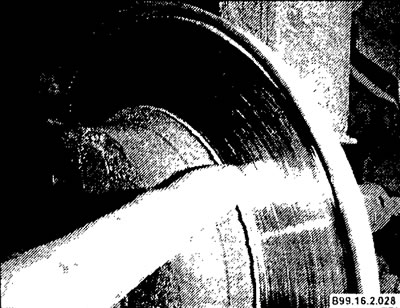
Before installing the pads, check the brake disc for grooves. Deep grooved disc needs to be replaced (see photo).
Measure the brake disc thickness.
Check the integrity of the anther and protective cuffs of the brake caliper. A damaged boot must be replaced, as penetrating dirt will quickly depressurize the caliper. To do this, the brake caliper must be removed and disassembled.
Press the piston with a wooden block (hammer handle), be careful not to distort the piston and damage the surface of the piston and boot.
Attention: When the piston is depressed, the brake fluid flows from the brake cylinder into the expansion tank. Observe the brake fluid in the reservoir and, if necessary, remove some of the fluid.
To remove the liquid, you can use a rubber bulb or a plastic bottle. Do not use food utensils. Under no circumstances should brake fluid be sucked out by mouth through a hose. After replacing the pads, the level of brake fluid in the reservoir should not exceed the MAX mark, because. liquid expands when heated. Escaping liquid can destroy the paint and cause corrosion.
Attention: If the brake pads are heavily worn, check the ease of movement of the piston. To do this, insert a wooden block into the caliper and ask an assistant to slowly depress the brake pedal. The piston should slide in and out easily. When checking, a different caliper may be installed. Make sure that the piston does not come out completely. If this happens, it is necessary to remove air from the brake system.
The following work step is optional: to avoid brake squeaking, the back side of the pads can be coated with a special grease. In this case, the lubricant must not get on the working surfaces of the brake disc. In case of contact, immediately wipe off and rinse the block with alcohol.
By inserting pads with outer gaskets (if there) on both sides, lower the brake caliper. Tighten the bottom finger.
Install the wheels, observing the labels applied when removing. Lower the vehicle and cross-tighten the mounting nuts.
Caution: Press the brake pedal sharply several times until you feel resistance.
Check the brake fluid level in the expansion tank, if necessary add fluid to the MAX mark.
Let the new brake pads run in by braking the vehicle several times at speeds between 80 km/h and 40 km/h by lightly depressing the brake pedal. Let the brakes cool down between successive brakings.
Attention: For the first 200 km, do not make unnecessary sudden braking.
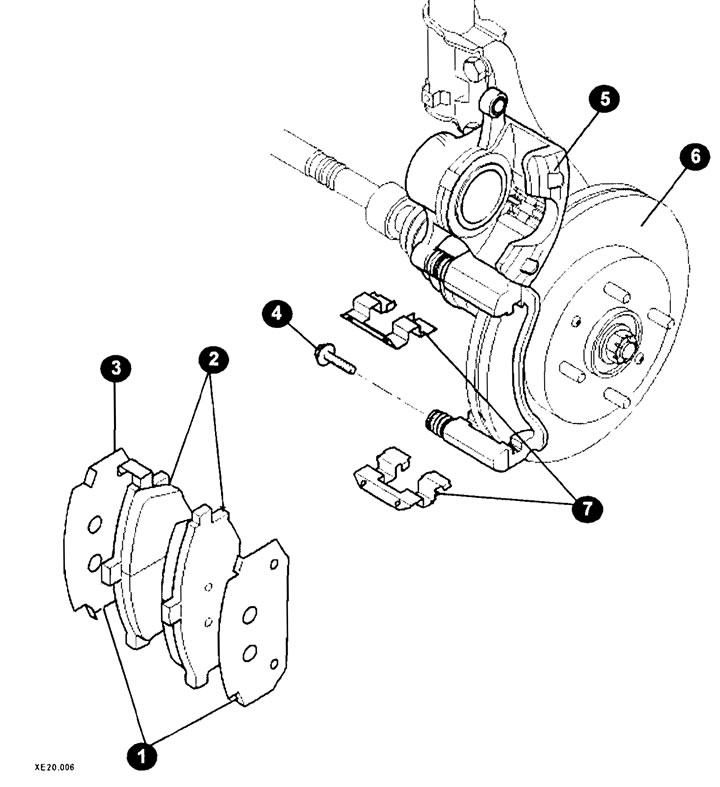
Front brake pad fittings
1 - gasket;
2 - brake shoe;
3 - wear indicator;
4 - finger;
5 - support;
6 - brake disc;
7 - bracket.