
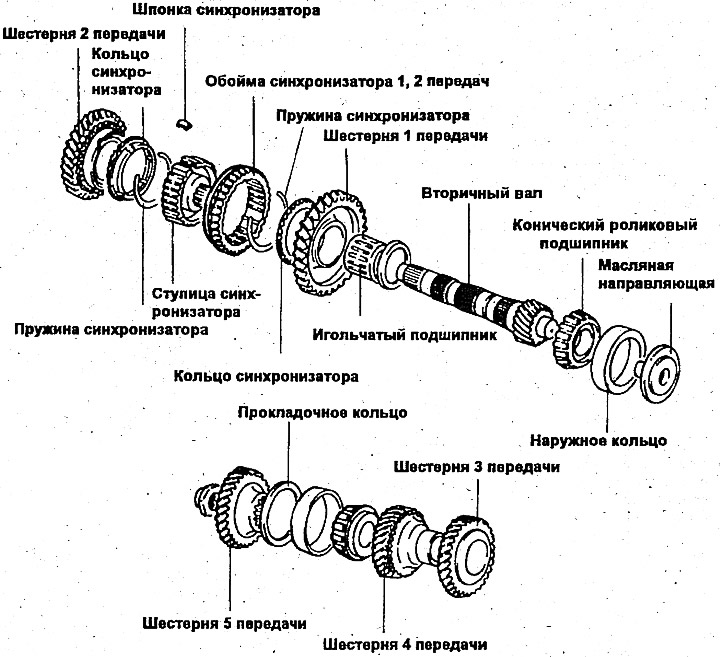
Disassembly
1. Remove the tapered roller bearing, input shaft fourth gear, spacer ring, output shaft third gear, second gear assembly with second gear bushing and needle roller bearing, first gear assembly with needle roller bearing and bushing and steel ball. Use a special tool (09432-33200).
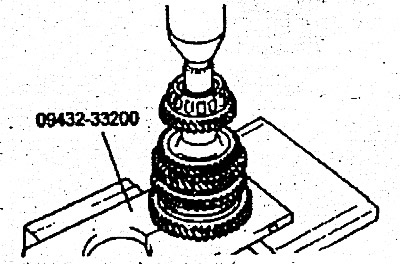
2. Using the special tool, remove the rear tapered roller bearing.
Warning. The bearing, once removed from the shaft, cannot be reused.
Examination
Output shaft
1. Check the outer surface of the output shaft at the needle bearing location for damage or excessive wear (section A).
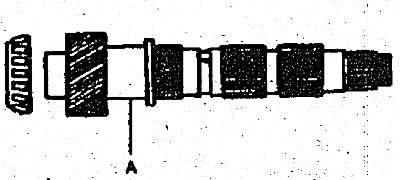
2. Check the splines for wear and damage.
Needle bearing
1. Install the needle bearing on the shaft with bushing and gear. The bearing should rotate smoothly without excessive noise or play.
2. Check the bearing cage for deformation.
Synchronizer ring
1. Check gear teeth for damage.
2. Check the inside surface for groove damage or wear.
3. Press the synchronizer ring towards the clutch and check the gap "A". If the value of the gap does not correspond to the required one, replace it.
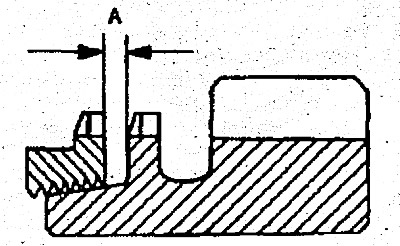
- Limit value - 0.5 mm
Hub and clip of the synchronizer
1. Install the synchronizer sleeve on the hub and check for smooth sliding.
2. Check the cage for wear.
3. Check end surfaces (in contact with gears) hubs for wear.
Warning. When replacing the hub, the clip must also be replaced.
Synchronizer key and spring
1. Check the center lug of the synchronizer key for wear.
2. Check the spring for looseness, deformation or damage.
Gears
1. Check helical gear teeth and clutch for damage and wear.
Assembly
1. The assembly of the shaft assembly is carried out in the reverse order of disassembly.